How to Embroider on Mesh Fabric Caps: Design & Stitching Guide
The Complete Guide to High-Quality Embroidery on Mesh Fabric & Trucker Caps
Embroidering directly onto mesh fabric—whether on classic 5-panel foam trucker hats, athletic running caps, or side panels of technical headwear—presents distinct manufacturing challenges. The open-weave structure and porous gaps of mesh often lead to thread sinking, jagged lettering borders, fabric puckering, and torn netting.
At ESSCAPS, with over 28 years of headwear manufacturing expertise, our computerized multi-head embroidery departments have perfected the science of precision embroidery on porous mesh and performance textiles.
1. Core Technical Rules for Mesh Embroidery Design
Achieving a clean, crisp embroidery look begins at the digital artwork and tech pack stage:
Increase Line Thickness (Avoid Ultra-Fine Details): Thin satin stitch lines under 1.5 mm easily drop into the open grid holes of the mesh. Design logos with solid, bold strokes and minimum text heights of at least 5 mm.
Incorporate Appliqué or Solid Borders: Adding a reinforced satin border, a twill patch base, or an underlay border frames the design, providing a stable foundation over uneven mesh holes.
Utilize 3D Puff Embroidery Strategically: For bold typography or central icons, high-density 3D EVA foam acts as a physical barrier that bridges mesh perforations, creating elevated volume without sinking.
2. Professional Digitizing & Machine Settings
Digitizing for open-hole mesh requires completely different parameters than standard cotton twill:
Heavy Tatami Underlay Stitching: Lay down a perpendicular double-grid or tatami underlay before the top stitching begins. This creates a dense microfiber net that supports the top stitches.
Lowering Stitch Density: Increasing thread density too high will cut the mesh fibers like a blade. An optimized density of 0.38 mm to 0.40 mm prevents mesh perforation while maintaining vibrant coverage.
Pull Compensation Adjustment: Because mesh stretches elastically when pulled by the needle, increase pull compensation by 0.2 mm to 0.4 mm in the embroidery software to preserve symmetrical circular logos.
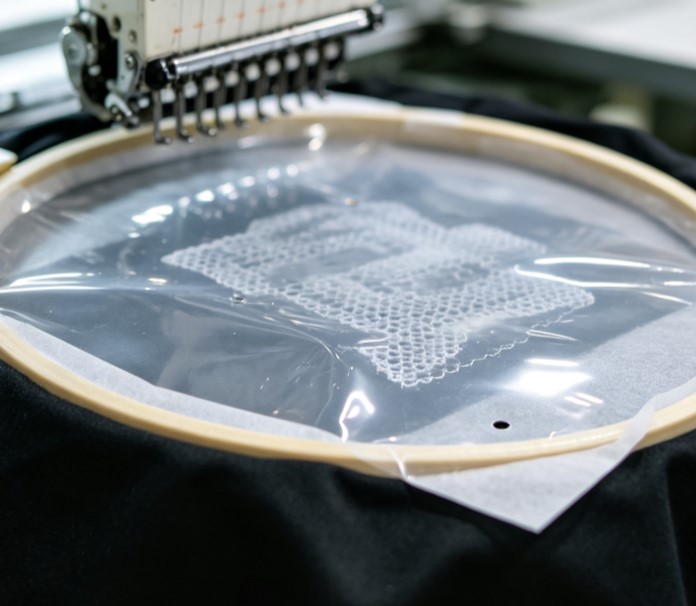
3. The Secret: Stabilizers & Backing Selection
The key differentiator between cheap promotional caps and luxury retail headwear lies in the backing system:
Water-Soluble Film Topping (Solvy): Placed directly on top of the mesh before stitching. It prevents the embroidery thread from sinking into the weave gaps and dissolves completely with light steaming, leaving zero residue.
Heavyweight Cut-Away Backing (2.5 to 3.0 oz): Tear-away backing tends to distort mesh holes during tearing. A rigid cut-away backing remains permanently inside the crown, maintaining structural tension across wash cycles.
Ballpoint Needles (75/11 SES): Sharp needles easily sever nylon or polyester mesh filaments. Ballpoint needles push mesh yarns aside rather than piercing them, eliminating fabric tearing.
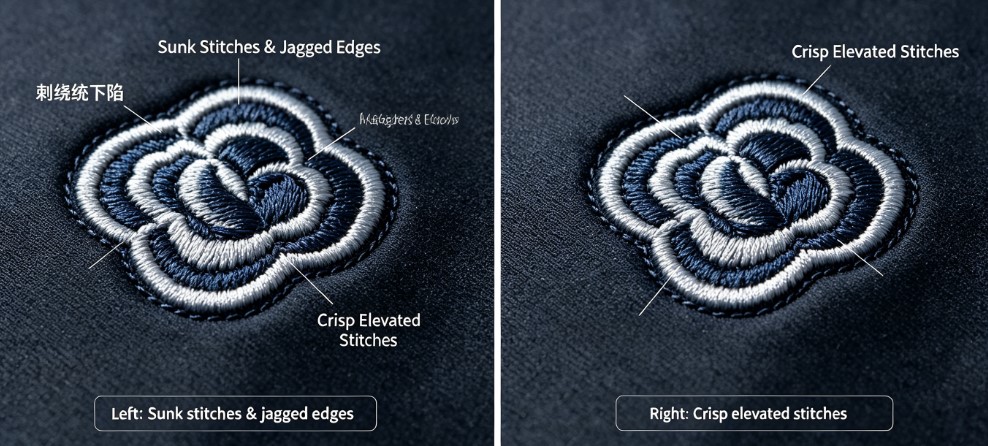
4. Factory Quality Control Standards
Every custom embroidered mesh cap produced across our 24,000 m² factory undergoes 100% inline optical inspection to verify:
Zero skipped stitches across mesh perforations.
Clean trimmed jump threads on both exterior and interior sweatbands.
Smooth tension balance without crown wrinkling or mesh puckering.